
When working with drum loops it’s easy to feel a little restricted. This need not be the case! In this post, Ben explores some neat little editing tricks, that will create endless variations, and have your drum tracks overflowing with originality.
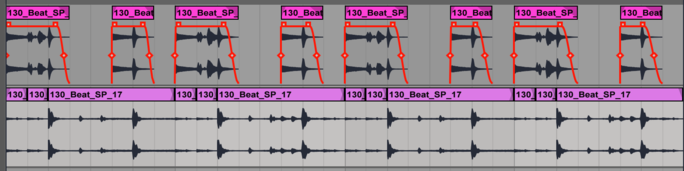
To get started, I’ve loaded a loop from our Vintage Drum Breaks Vol 1 pack. It’s a simple groove with a lovely shuffle and a crunchy vintage character. To keep things simple I’ve shortened it to the first two bars. I’ve also created an empty audio track to help with editing and set the grid to 1/8.
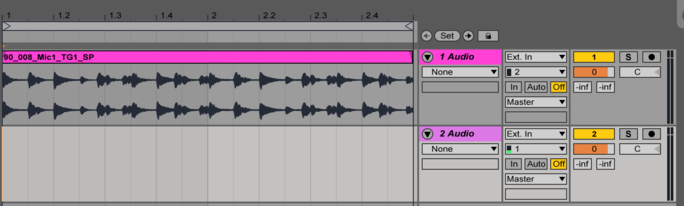
Ready to be chopped
I’d like to create a half-time version of this loop, so the first thing I do is chop it on the gridlines using the keyboard shortcut CMD+E (split clip).
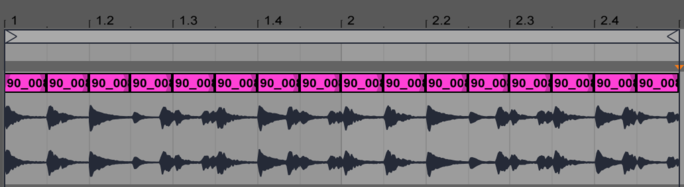
Sliced into 1/8th note chunks
Next I listen through and pick out my favourite kick and snare hits, moving them to the track below and arranging them into a simple half time pattern.
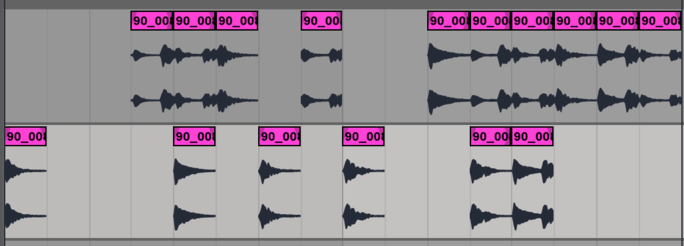
Bottom – the kick and snare of our half time groove laid out; top – the remaining parts of the original drum loop
Finally, to complete our half time drum loop, I use the remaining fragments in the top track to fill the spaces between the kicks and snares. Because everything in the pack loops perfectly, everything slots nicely into place, meaning we only have to worry about finding the most musical result.

All chopped up!
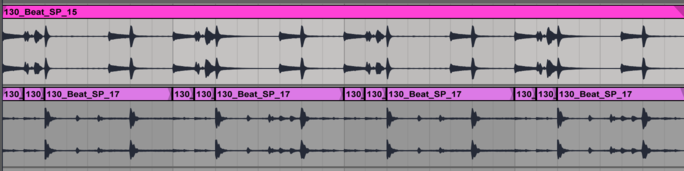
Sometimes, a drum loop has almost everything you’re looking for, but there are elements of another groove which you feel could contribute too. In this situation, splicing and editing drums together is a great way of getting the best of both. I’ve loaded up two loops from our Complex Percussion & Textures pack and dropped them into two separate audio tracks. I love the tight, focused kick of the first loop and the jittery found sound percussion of the second.

The two loops layered on top of each other
We don’t want any kicks competing for precious space in the low end, so I highlight and delete all those hits from the second loop. This already sounds pretty cool. The rim click and clap are layering up nicely and the extra percussion is filling in all the spaces left by loop 1.

Kicks chopped out of loop 2
Loop 2 contains some cool textural noise which our chops have broken up. I’ve copied + pasted a small section of this noise into the spaces in a way that joins in with the loop rhythmically and smooths over any gaps.
Sampling some of the background texture to fill out gaps in the loop
Loop 1 also contains some textural noise which is now fighting for space with loop 2. I’ve chopped it out of all the spaces left by the kick and rimshot and used the fades tool (CMD + ALT + F) to smooth out the edges.
Chopping out extra noise and smoothing over edits with fades
A frequently overlooked tool for creating variations is Ableton’s Slice to New MIDI Track feature. Using another loop from Vintage Drum Breaks Vol 1, I right clicked on the audio clip and chose “Slice to New MIDI Track”, selecting “1/8th Note” and “Built-in” in the dialog box.

Slice to MIDI settings
Ableton magically creates a drum rack with 1/8th note long slices of the loop, and a MIDI clip which plays them all in order.
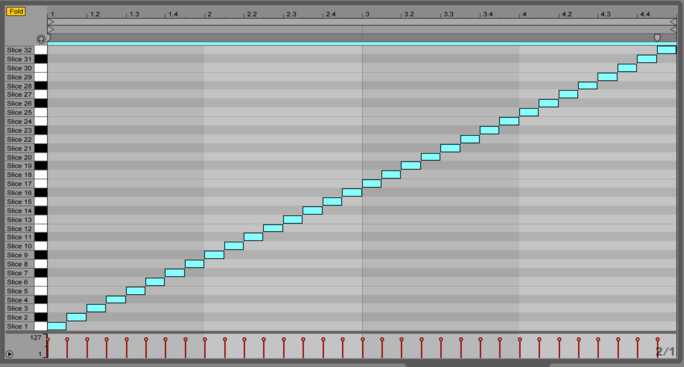
By setting the grid as wide as it can go (right click in the piano roll and choose “Widest”) and then choosing “Current Grid” in the quantize settings dialog, we can make all the MIDI notes trigger at once.

Quantise settings dialog
Now all we have to do is drop an Arpeggiator from the MIDI Effects section onto the track, set Rate to 1/8, Gate to 100% and style to Random Once. Press play and listen to your endlessly varying drum loop!

Arpeggiator settings
With these simple tricks for editing drums, you can stretch your loops significantly further and keep your drum tracks consistently fresh.