
Although more traditionally found with the world of film foley sound effects, field recordings are being used more and more within electronic music production. They offer a constantly evolving and inspiring palette of sounds that can inspire new rhythmic and sonic ideas. In this post Mountain Range (Ambient Electronica), runs through some basic techniques to start manipulating the sounds around you into useable percussion and beats.
WARPING NATURAL RHYTHMS
[sc_embed_player fileurl=”https://d103di0l3rpbtf.cloudfront.net/news/wp-content/uploads/2016/07/22124501/Audio-1.wav”]Here is a recording of a squeaky door handle
There are two options for making a beat with this clip. We will explore stretching the audio first:
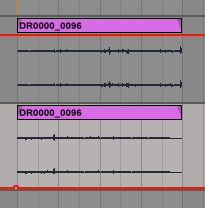
Using Ableton’s ‘Warp’ settings, we can pull the audio into something more even by lining up each squeak with the quarter notes on the grid:
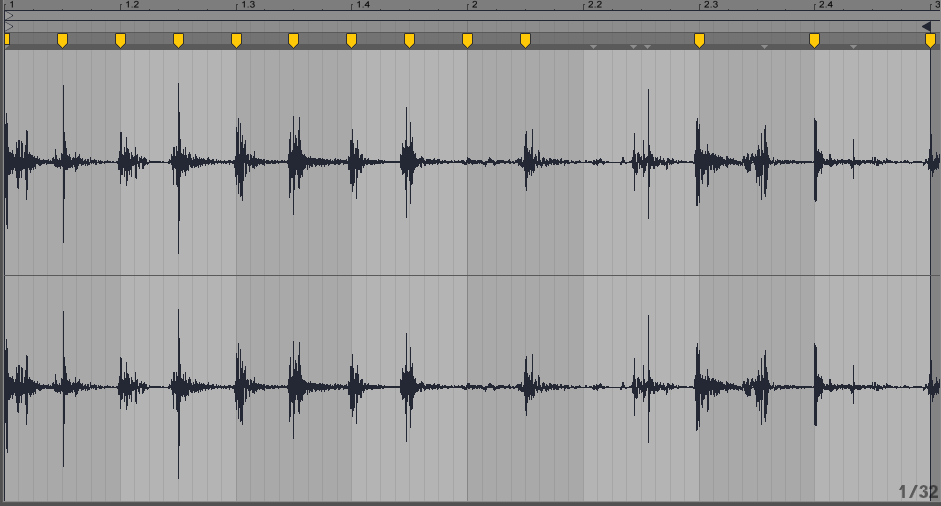
You can choose a ‘warp’ setting that best suits your sound. I want to preserve as much of the natural sound as possible, so I’ve set it to ‘Complex’:

Now that the audio is warped it is also tempo sensitive, let’s slow it down a little and start looping 4 bars (cmd-L). From here we can use some digital sounds to build a beat around it!
The other option is to let the natural rhythm determine your tempo and beat.
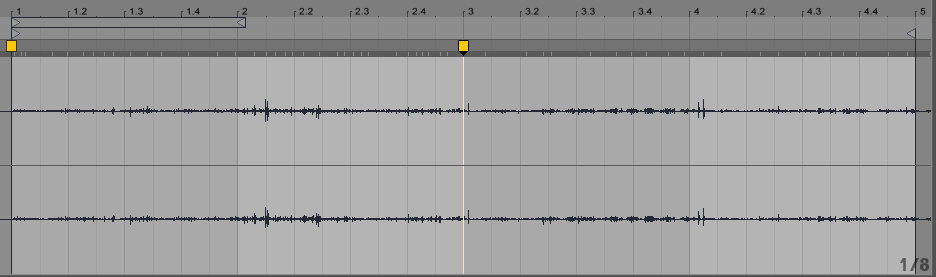
Starting from the original audio again, we can select a section we like the sound of:
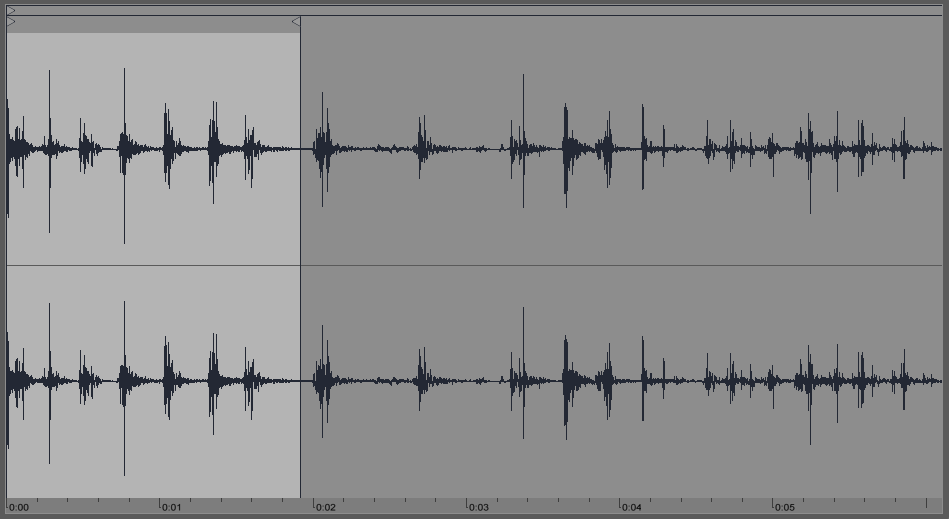
Now, we can drag the global tempo until that audio loops comfortably over 2 or 4 bars (alt-cmd-F can help with any pops/clicks):
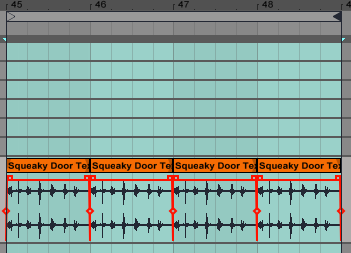
The quickest way to add other elements to this is to bring up a MIDI track with a ‘Drum Rack’ loaded onto it full of your favourite sounds, and then dragging our audio across to the this channel.
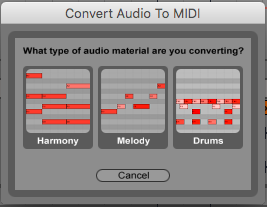
Ableton will give you the option to ‘convert audio to midi’
Select ‘Drums’ and Ableton will pretty accurately mimic the rhythm present, as well as the frequency on sounds. Our drum rack of sounds can immediately be layered with the found sound:
[sc_embed_player fileurl=”https://d103di0l3rpbtf.cloudfront.net/news/wp-content/uploads/2016/07/22124507/Audio-5.wav”]Our layered sounds
From here, it’s a simple case of moving your MIDI clips around and adding a few effects:
[sc_embed_player fileurl=”https://d103di0l3rpbtf.cloudfront.net/news/wp-content/uploads/2016/07/22124509/Audio-6.wav”]Voila!
Here are some other examples:
[sc_embed_player fileurl=”https://d103di0l3rpbtf.cloudfront.net/news/wp-content/uploads/2016/07/22124511/Audio-7.wav”]Foley rhythm 1
[sc_embed_player fileurl=”https://d103di0l3rpbtf.cloudfront.net/news/wp-content/uploads/2016/07/22124515/Audio-8.wav”]Foley rhythm 2
TEXTURES
Aside from use within beats, field recordings can add texture to our productions.
[sc_embed_player fileurl=”https://d103di0l3rpbtf.cloudfront.net/news/wp-content/uploads/2016/07/22124517/Audio-9.wav”]Here is a recording of a bag being rustled about
Although you could say this is an already perfectly useable bit of texture, let’s go ahead and try and get some more out of it.
To begin, let’s take some weight out of the sound and remove any frequencies that we don’t think we’ll need / could muddy up our mix:

Now, chop the loop in halfway and create a new track. Drop the second half of our loop directly under the first, so they’re layered together, then hard pan the two channels left and right.
This is a really quick way of adding more movement and widening the stereo image without causing any phasing! (It’s always handy to record more of a sound than you need)
[sc_embed_player fileurl=”https://d103di0l3rpbtf.cloudfront.net/news/wp-content/uploads/2016/07/22124520/Audio-10.wav”]Our hard panned texture
From here there are a number of ways to process the audio further:
Grain Delay:
Load up Ableton’s Grain Delay, set you mix to 50%, feedback to 50% and spray up to 500ms.
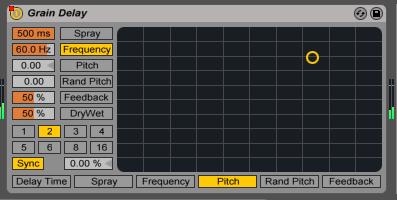
This should thicken up the sound nicely (perfect for side-chaining). Try playing around with the pitch too!
[sc_embed_player fileurl=”https://d103di0l3rpbtf.cloudfront.net/news/wp-content/uploads/2016/07/22124522/Audio-11.wav”]Our thickened rustle sound
Warp Stretch:
We can expound on some of the recordings textural qualities by setting a warp marker at the start and another midway through.
Set the warp engine set to ‘Texture’ and a high ‘grain size’ and ‘flux’.
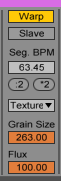
Then pull the second as far right as you like, and we can “Zoom in” on the sound and have even more detail to work with.
[sc_embed_player fileurl=”https://d103di0l3rpbtf.cloudfront.net/news/wp-content/uploads/2016/07/22124524/Audio-12.wav”]Our completed texture
There you go, some really simple ways to start playing with found sound!